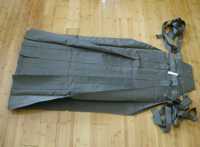
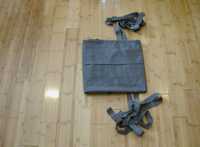
A hakama needs to be folded when it is taken off. It should be done on a clean flat surface.
It must be done to keep the folds in a hakama. Hanging causes a hakama to loose the crisp folds. All the folds in a hakama
run parallel and need to be the same width from the top to the bottom.
Start with the hakama face down and find the innermost fold. Most
hakama have a seam running down the inner fold, but you may have to guess if
there is no seam and the fold has been lost. The inner fold is pushed to on side and then flattened out. The
back of the hakama folds alternately from one side to the next and you can use this fact to
determine which side the inner fold goes to.
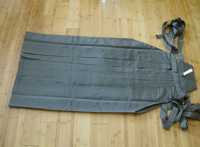
Working from the inner back fold, you must make each fold
even. The folds should run parallel so the overlap at the top should be
maintained to the bottom. If you have lost the folds, use a ruler to
measure the depth and overlap of each fold. Some hakama have all the
folds stitched to keep them there.
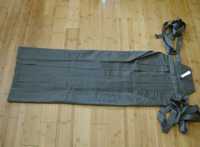
The next step is to flip the hakama over so you can fold the front. This takes
some practice since the folds on the back tend to come apart. Drap the bottom of the hakama on the surface
you are folding on to keep everything together. Clothespins can be used
along the bottom to keep the back folds from coming undone.
Again you work from the inner fold to the front of the hakama, make each fold
even. The folds run parallel so the overlap at the top should be
maintained to the bottom. If you have lost the folds, use a ruler to
measure the depth and overlap of each fold.

The edges of the hakama can be folded inward at this point to reduce the size. This is
not recommended for storing a formal hakama, but can be useful for fitting
practice hakama in a gym bag.
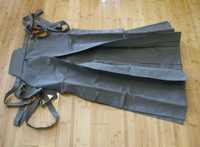
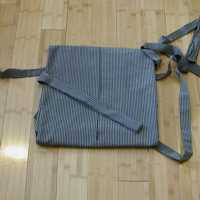
The hakama is folded in thirds. If the back folds have separated,
start the process again.
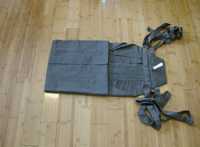
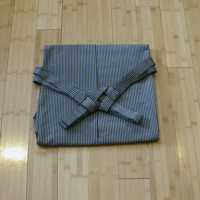
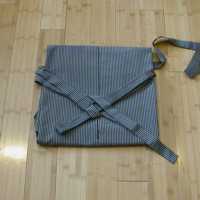
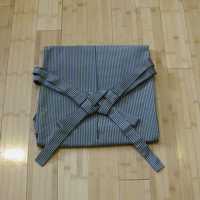
The front strap to the left (first strap) is straightened and folded in
half. It is folded in half again and laid across the diagonal of the
hakama. Note that if the strap is too short to go across the diagonal, it
may have to be folded in thirds.
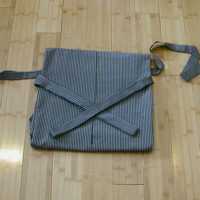
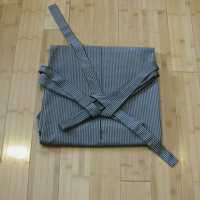
The same process is repeated for the front strap on the right (second
strap). The straps should form an X across the hakama.
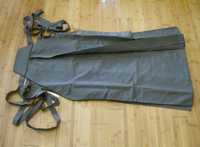
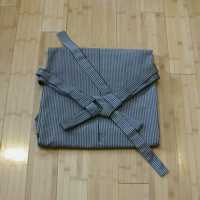
The back strap on the left (third strap) is laid on top of the first strap,
goes over the second strap, and is passed under both straps were they
intersect. This strap should be pointed at the top of the hakama.
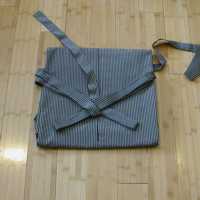
The third strap should then wrap around the first strap above the
intersection point. The third strap should then follow the first strap.
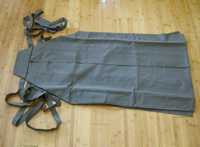
The back strap on the right (fourth strap) is laid on top of the
second strap, goes over all strap, and is passed under all straps were the
first two intersect. This strap should be pointed at the top of the
hakama.

The fourth strap should then wrap around the second strap above the
intersection point. The fourth strap should then pass under the third strap
that was wrapped around the first strap.
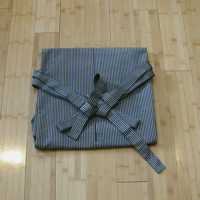
The third and fourth straps can be folded back under if they are too long.